
Screencast
iOS 7: Strategies for Improved Battery Life
26/09/13 19:59 Filed in: Technology
In this screencast tutorial I cover some of the things I discovered that helped improve the battery life of my new iPhone 5s. I go over each and every setting that seems to effect battery life so you can fine tune your own battery experience. It is always a trade off between features and the function of your battery so you don't have to use everything I cover here but as you fine tune your own settings you should hopefully get your battery to where you want it to be.
As always if you have any questions or comments feel free to leave them here or on my Youtube Channel.


Comments
Upgrading to iOS 7: A Step by Step Walk Through
18/09/13 19:58 Filed in: Technology
It has been great to see the response to this video with a lot of different people picking it up including Allison Sheridan from the Nosilla Podcast which I listen to. I have had a few questions along the way with people wondering if it will mess up their jail break (yes it will) and wondering if they really need to back up (yes you should). If you have any questions feel free to leave them below or on my Youtube Channel.
Reflector: Mirroring Your iOS Device on Your Mac
13/09/13 19:56 Filed in: Technology
Reflector allows you to mirror your iOS devices to your Mac using Airplay. Not only does Reflector do a great job of mirroring your iOS screen to your Mac, it also puts the device bezel around your screen and even lets you choose the color (white or black). This really works great for demonstrations because it allows the user to see the actual device instead of just looking at the screen and wondering what they are looking at until their eyes adjust.
Reflector also has the added feature of allowing you to mirror multiple devices at once. So if you are trying to demonstrate the interaction of one device to the other, you can show both devices on your screen and operate them independently at the same time and still capture both screens. This can really come in handy depending on what you are trying to demonstrate.
So in this screencast I demonstrate how Reflector works so you can get an idea of how I do my screencasts. Of course I record these screencasts with Screenflow, the best screen capture and editing software I have ever used. Someday I'll do some screencasts on how I do my screencasts which will feature Screenflow.
Feel Free to leave any comments or questions below or on my Youtube Channel.
Everpix Part 1: Mac Set Up & Web Interface
06/09/13 13:18 Filed in: Technology

In this screencast I walk you through the set up of Everpix. I also cover the web interface and walk you through the various options for viewing and sharing your photos. If you would like to try Everpix and would like an extra 6 months of photo viewing on the service you can use my link here (of course I get 6 months as well
Managing Your iCloud Storage
29/08/13 18:23 Filed in: Technology

What I discovered was I was backing up 3 iOS devices which was taking up the majority of data mainly because of photos an videos that were being backed up. These things were causing the spike in my usage and I had to take care of that or may backups would cease. If you are in the same boat, I would recommend the following:
- Turn off backup for your camera roll.
- Remove any large files you may have added to iCloud by looking at the Apps section of iTunes.
- Use a program like PhoneView to move your videos and other files to your Mac and back them up there.
In this screencast I walk you through how to do each of the things above. As always if you have any comments or questions leave them here or on my YouTube Channel,
Plex Media Server Part 3: Accessing Your Media Remotely
22/08/13 07:21 Filed in: Technology

In this screencast tutorial I cover how to access your media remotely. I take a look specifically at the myPlex web interface and the iOS application. I also demonstrate how you can add media from around the web on the fly into your Plex interface so you can view it on your favorite media device. Plex really is an excellent media server and for a free application it really is incredible! If you want more features you should also consider the Plex Pass which is a paid subscription. For limited time they have a lifetime subscription which really looks like a steal with all the development they have been doing!
As always thanks for all your support! If you have any questions or comments feel free to leave them here or on my YouTube Channel.
Plex Media Server Part 2: Editing Metadata
14/08/13 07:13 Filed in: Technology
In this screencast tutorial I cover how to edit the metadata for your media. I show examples of how Plex could get it wrong and what you need to do to make the changes and make sure those changes stay and don’t get updated again in the future.
As always, thanks for your support! If you have any questions or comments, feel free to leave them here or on my YouTube Channel.
Monitoring Your Server With iStat for iOS
01/08/13 08:22 Filed in: Technology
In this weeks screencast I cover how to monitor the physical state of your server using an iOS application called iStat. iStat is a universal iPhone and iPad application that monitors everything from the heat sensors to the fan speed on your Mac. Check out this screencast to see how it works!
If you have any questions or suggestions feel free to leave a comment here or on my YouTube Channel.
Plex Media Server Part 1: Installation & Set Up
09/08/13 06:51 Filed in: Technology
Plex is a media server with a lot of the features most people want in a home media server. Plex combines Movies, Television, Music, Photos and Web services into one easy to use and set up application. Plex automatically pulls the metadata for your media and does a great job presenting it inside the Plex interface. The Plex Media Manager is a web based application so you can access it anywhere you internet access. Combine that with their applications and services for so many different devices and Plex really is a great media server for your content.
In this weeks tutorial I cover how to install and get Plex set up. Next week I’ll cover how to edit and tweak your Media. If you have any questions feel free to comment here or on my YouTube Channel.
Online Back Up With Backblaze
26/07/13 13:08 Filed in: Technology
1. Hardware will fail at some point.
No matter how well you take care of your computer, hard drive and other electronics we all know that our hardware will fail at some point in the future. It is usually before we think it will happen so it surprises us, but we know it will take place. When it does fail, many times it fails beyond recovery, meaning all of you data could be lost forever.
2. A good backup strategy includes multiple copies
A good rule of thumb is, one copy is good, multiple copies is better. The more copies the more you minimize your risk of losing data.
3. Location of those back ups can be as important as how many backups you have.
You have to take into account the fact that having all your backups in one place means you have a single point of failure. If they are all at your home and get stolen or burned up or damaged by water or some other force of nature you have lost all of your data. If you have your data in multiple locations (at least one more besides your home) you still have your data even if you lose your local copy.
With this in mind, here is my strategy. First, I have a time machine back up of my data. This gives me an incremental back up just in case I accidentally delete something I want to get back. I can go back in time and get it with Time Machine. It also serves as one complete back up. Second, I use a Drobo as an external drive for those backups so if one hard drive fails my data is still safe. Next, I use SuperDuper! to make a bootable clone of my main drive so if that one fails I can boot from this backup and keep working as if nothing happened until I get an internal drive replacement. Finally, I back up to Backblaze online to handle my offsite back up. For things I really don’t want to use like family photos, etc. I back those up to another external drive that I store in a safe place.
With that in mind, I did this tutorial on Backblaze for offsite back up. Backblaze has been a great service that integrates well with the Mac and allows you to set it and forget it. It continually backs up in the background. Whatever strategy you use, be sure to keep all of these possibilities in mind (I’m sure I’ve forgotten some but at this point this is the extent of my own paranoia on the topic of backup
Feel free to leave a comment here or on my YouTube Channel!
Mountain Lion Server: Changing Local to Network User
19/07/13 13:05 Filed in: Technology

In this screencast tutorial I cover how to change a local account to a network account and move the users local files over to the server to allow network access from any computer on your network.
As always if you have any questions or comments feel free to leave them here or on my YouTube Channel.
Mountain Lion Server: Remote Time Machine Backups
11/07/13 12:56 Filed in: Technology
In this screencast tutorial I cover how to set up your portable Mac to enable remote Time Machine backups. This allows your backups to happen over the internet back to your server and allows you to create your very own cloud back up strategy. A couple of things to keep in mind with this approach. First, this is not the complete back up solution. You are protected from hardware failure but if your house burns down you lose your back up. So you will need to consider other offsite back up. Second, this is not foolproof. Because of things like bandwidth and internet interference you could cause your back up to get corrupted if you have major interruptions. So just because it is possible I would caution you in using Time Machine this way. Like anything else your mileage may vary so I want to make sure I put in that warning to start!
As always feel free to leave a comment or question here or on my YouTube Channel.
Mountain Lion Server: Remote Network Account Access
05/07/13 12:50 Filed in: Technology
To make this work you can use Mobile Accounts (which I covered in another screencast HERE) which will keep those home folders in sync between your server and the local portable Mac as a solution. Or you can have your users log into their network accounts over the internet and still have access to them. There are pros and cons to each solution with the obvious one being network and server bandwidth which directly impacts speed.
In this screencast tutorial I cover how to set up your portable Mac to allow your users to connect to their network accounts over the internet. I also cover how to connect and log into their account through your Open Directory remotely.
As always, feel free to leave any comments or questions below or on my YouTube Channel.
Mountain Lion Server: Changing Your Host Name
27/06/13 12:45 Filed in: Technology
In this screencast tutorial I walk you through how to change your Host name. I also cover the services you will need to update once that change is done to make sure you don’t have any of your services break in the process.
As always feel free to leave a comment here or on my YouTube Channel.
Mountain Lion Server: Hosted Mac Mini Server
30/05/13 23:14 Filed in: Technology

The MacStadium team has been great and I really see the value in the products they have to offer. You can see more about MacStadium’s services at their website www.macstadium.com. If you do happen to decide to host your server, I there are various tutorials up on their blog, some of which I have been contributing on how to get your Mountain Lion Server up and running in a hosted environment.
In this screencast tutorial I give an overview of having your Mac Mini Server in a hosted environment. I cover the differences between a home hosted versus data center hosted server, some of the costs and benefits of a hosted server, and some of the basics of logging in and working with a server in a hosted environment.
As always feel free to leave a comment below or on my YouTube Channel!
Mountain Lion Server: IceFloor Firewall
24/05/13 17:09 Filed in: Technology
In this screencast tutorial I cover some advanced firewall administration for the built in PF Firewall using a donation ware software program called IceFloor. I cover how this software may be helpful for home users, how to set the software up, what settings to put in place, and ways to customize and test your firewall.
As always feel free to leave a comment below or on my YouTube Channel if you need any help or have any questions.
Mountain Lion Server: SFTP
17/05/13 17:02 Filed in: Technology
In this screencast I cover how to connect to your files and folders remotely using SFTP. SFTP is more secure that FTP and is a great way to navigate remote file systems. I talk about how to set up SFTP, how to connect to your shares both through the terminal and through an app called Forklift. I also cover some basic commands to move files from one server to another.
As always if you have any questions or comments, feel free to leave them here or on my YouTube Channel.
Mountain Lion Server: SSH
10/05/13 16:51 Filed in: Technology
In this tutorial I show you how to access your server remotely and how to copy files back and forth using terminal. In the next screencast I will cover how to do this using the more easy to use SFTP through a file management program called Forklift.
As always feee free to leave a comment here or on my YouTube Channel.
Mountain Lion Server: RADIUS Set Up
03/05/13 11:01 Filed in: Technology
As always, feel free to leave questions or comments below or on my YouTube Channel.
Mountain Lion Server: Splashtop iOS Screensharing
26/04/13 10:54 Filed in: Technology
Some of the controls do take some getting used to but there is a handy guide to help explain how each of the services work. The latency is really good and it makes it a great tool for every server administrator to have. As always, if you have any questions feel free to leave them below or on my YouTube Channel.
Mountain Lion Server: Server Admin Remote
19/04/13 10:46 Filed in: Technology
In this screencast I cover how to download, set up and use the application on your iPhone. This really is a great little app and should come in handy for helping you check in on your server. If you have any questions or comments feel free to leave one below or on my YouTube Channel.
Mountain Lion Server: Firewall Set Up
12/04/13 11:04 Filed in: Technology
In this weeks tutorial I cover how to set up the built in firewall on OS X Server. I cover the basic set up and various options found in the GUI built into system preferences. In a future screencast I will cover how to run the server with the command line and a third party GUI called Icefloor.
As always if you have any questions feel free to leave a comment here or on my YouTube Channel.
Mountain Lion Server: Server 2.2.1 Update
05/04/13 14:23 Filed in: Technology
Here are some of the main changes:
1. Caching Service: This allows you to cache any updates that have been downloaded from the Mac App Store so they don’t need to be re-downloaded. I covered this in detail in a previous screencast.
2. Centralized SSL Certificate Management: Apple took the SSL Certificate management out of the Server hardware area and moved it to it’s own service. I cover the changes in detail for those who had difficulty with the new interface.
3. Time Machine: Changes include seeing which computers are backed up, when they were backed up, and the size of the back up.
As always feel free to leave comments here or on my YouTube Channel.
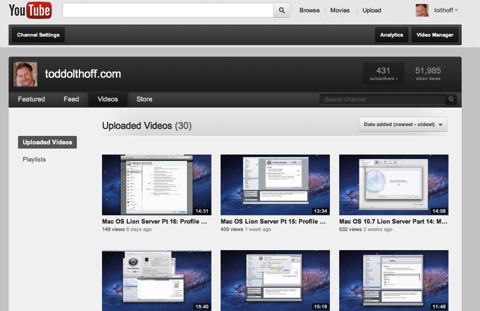
NEW! All Video Tutorials in One Place
01/04/13 14:46 Filed in: Technology
I have had a lot of feedback lately asking me to put all of my tutorials on my website in an easy to view format. Some of you don’t like using the YouTube interface and would prefer to come to the website instead to view the tutorials in one place. So to make it easier, I have added a section to my website on Technology which includes all the tutorials sorted by topic. It is a start and I still have things I want to do make it better but I think it will make it easier for you to view them in order instead of using the playlist feature on my YouTube Channel.
I also included a donate button for those who want to buy me a cup of coffee (Starbucks is one of my regular hang outs) for the work on the tutorials. Please don’t think you have to donate to use the tutorials, I am just doing this for those who wanted to do something but didn’t have a way to do it.
If you get a chance to check the tutorials section out, give me some feedback on what you think and how I could improve it. You can email me or leave a comment here.
I love doing these tutorials and helping others with things I have learned. I also love to hear how they help others so drop me a line if you get a chance.
Mountain Lion Server: Mobile Accounts
29/03/13 14:40 Filed in: Technology
To solve this problem, Server has the ability to set up mobile accounts where basically sets up a sync service that keeps your home folder in sync between the server and the client machine. Before a client leaves the network, the home folder syncs to the client machine. When the client comes back into the network, any changes the client has made get sync’ed back to the server to keep everything the same. This way the client can still log into any computer on your network and still take their laptop on the go.
As always, feel free to leave a comment here or on my YouTube Channel. Thanks for watching!
Mountain Lion Server: Work Group Manager Preferences
22/03/13 14:35 Filed in: Technology
Work Group Manager can still be used to manage all of your users, groups, devices and device groups in a non web interface on your server. It still works well and gives you another option for setting up your server.
As always feel free to leave a comment here or on my YouTube Channel. Thanks for watching!
Mountain Lion Server: Bind Clients to the Server
15/03/13 14:29 Filed in: Technology
In this video tutorial I cover how to set that up properly. I also cover the process for binding your clients to the server and what it looks like in Work Group Manager.
As always feel free to leave a comment here or on my YouTube Channel. Thanks for watching!
Mountain Lion Server: Work Group Manager Overview
08/03/13 14:23 Filed in: Technology
In this screencast tutorial I cover how to download and install Work Group Manager. I give a basic overview of the application and cover how to use it to work with users and groups on your server.
As always, thanks for watching. Feel free to leave a comment here or on my YouTube Channel if you have a question.
Mountain Lion Server: Remote Server Access
28/02/13 14:17 Filed in: Technology
In this screencast tutorial I cover how to connect to your server remotely. I demonstrate a couple of ways to do this and how to make sure you set it up properly without accidentally installing the server components on your non server device.
As always feel free to leave a comment here or on my YouTube Channel. Thanks for watching!
Mountain Lion Server: NetInstall
22/02/13 14:10 Filed in: Technology
In this screencast tutorial I cover how to set up a disk image to be used for your NetInstall. I also cover some of the customization options to simplify the install process and then show how the process works.
As always feel free to leave a comment or question here or on my YouTube Channel. Thanks for watching!
Mountain Lion Server: DHCP
15/02/13 14:04 Filed in: Technology
As always feel free to leave a comment here or on my YouTube Channel. Thanks for watching!
Mountain Lion Server: Connecting iOS to WebDAV
07/02/13 13:56 Filed in: Technology
In Mountain Lion Server you can specify certain folders to be available to your iOS device and then connect to those files through the WebDAV interface built into your iOS device. This makes all of your files portable and allows you to use them where you are at on the road (provided you have a public domain address or VPN).
In this screencast tutorial I cover how to connect to those files and folders you designated for sharing with iOS devices. I cover how to do this in a couple of apps to give you an idea of how it works. As always, please feel free to leave a comment here or on my YouTube Channel.
Mountain Lion Server: Wiki Customization
30/01/13 13:49 Filed in: Technology
As always, thanks for checking out my tutorials. If you have any questions feel free to leave a comment here or on my YouTube Channel.
Mountain Lion Server: Wiki Set Up
28/01/13 14:36 Filed in: Technology
In this screencast tutorial I go over how to set up the Wiki Service which functions along side the Website Service to create the built in Wiki Website. I also give a basic tour of the site to give you an idea of what you can do with it. In the next screencast I will cover how to customize your site to make it your own.
As always if you have any questions, feel free to comment here or on my YouTube Channel.
Mountain Lion Server: Web Server
18/01/13 08:51 Filed in: Technology
1. Does your ISP block port 80?
If your ISP blocks port 80 then you will not be able to host your own website as that is the port that those outside your network will use to access your site. You may have to call your ISP to see if there is a way to open that port. In many cases they will want you to purchase their business internet service which is usually more costly but does come with a static IP address which helps with the next issue.
2. Do you have a static IP address?
If you are using a dynamic IP address, which most home users are, you are leasing an IP address that could change at any moment. Once this IP address changes all of your web services will go offline until you discover the change and update your domain registrar to point your domain name to the new IP address. This will cause your website to be down until you make the change. Now most ISP's don't change the IP that often. It usually happens when you reboot your modem, but the risk of it changing might be too big, especially if you are dependent on having your website up and running 24/7. For home users who are only doing this for family it is not as critical, but for the rest, you really need a static IP.
3. Are you ok with Downtime?
Running a web server that hosts critical websites means that uptime of your sites is up to you and your server. So if you have a power outage and your server goes down, so does your website. If you forget you are hosting a site and turn off your server, you lose your site. So you really need to weigh the costs before you decide to do your own hosting.
Hopefully that gives you some things to consider before hosting your site. In the tutorial I cover how to get your site going and even how to set up virtual hosting if you are looking at hosting various domains/websites on your one server. This includes a look at the DNS service so if you haven't covered that yet, you may want to view my tutorial HERE.
Thanks for watching! If you have any comments or questions leave them here or on my Youtube Channel!
Mountain Lion Server: Profile Manager-Devices
10/01/13 08:44 Filed in: Technology
As always feel free to leave a comment or question here or on my Youtube Channel. Thanks for watching!
Mountain Lion Server: Profile Manager-Users & Groups
04/01/13 08:36 Filed in: Technology
I cover each of the settings in both the User and Groups screens. I also share my own strategy of using groups to manage users instead of having to update each individual user’s profile one at a time. In the next screencast I will cover how to set up device specific profiles which is another great way to manage the settings on your network.
As always, if you have any questions feel free to leave them here or on my Youtube Channel. Thanks for watching!
Mountain Lion Server: Profile Manager-Mac Enrollment
21/12/12 17:01 Filed in: Technology
If you haven’t had a chance to view my previous tutorial on setting up Profile Manager start with that tutorial first by clicking HERE. In this screencast tutorial, I continue my look at Profile Manager and walk through how to set up your Macs to use the service. I cover how to install the needed certificates to allow your Macs to be managed and cover how they look once enrolled within Profile Manager.
If you have any questions feel free to leave a comment below or leave a comment on my YouTube Channel.
Mountain Lion Server: Caching Service
14/12/12 16:55 Filed in: Technology
In this screencast tutorial I cover how to configure the Caching Service and set your clients to use that service instead of the Mac App Store. If you have any questions feel free to leave a comment below or on my YouTube Channel.
Mountain Lion Server: Back Up
30/11/12 16:42 Filed in: Technology
As always if you have any questions feel free to leave a comment here or on my YouTube Channel.
Mountain Lion Server: Mail
23/11/12 16:34 Filed in: Technology
In this screencast tutorial I cover how to set up your own Mail Server. I go over the pros and cons of hosting your own email. I talk about the basic requirements of hosting your own server at home and how to set up your clients to use the service. As always if you have any questions feel free to leave a comment below or on my YouTube Channel.
Mountain Lion Server: FTP
16/11/12 16:28 Filed in: Technology
In this screencast tutorial, I cover how to set up your own FTP share in Mountain Lion Server. I talk about how to log into your FTP share using Terminal and an FTP client.
As always if you have a question, feel free to leave a comment below or leave a comment on my YouTube Channel.
Mountain Lion Server: VPN
09/11/12 16:20 Filed in: Technology
In the screencast tutorial below, I cover how to set up the VPN Service on Mountain Lion Server including how to set up the right range of addresses that won’t interfere with your regular DHCP range, which protocol to use (L2TP or PPTP), and ways in which you can export a profile to use to set up your client machines. I also cover setting up and connecting to your VPN Service remotely.
As always if you have any questions feel free to leave a comment below or on my YouTube Channel.
Mountain Lion Server: Messages
02/11/12 16:11 Filed in: Technology
In this tutorial I cover how to set up the Messages Service and connect all your clients to the service. I also cover how to use the service and get your buddy list set up and running. If you have any questions along the way, feel free to leave a comment below or on my YouTube Channel.
Mountain Lion Server: Contacts
26/10/12 16:03 Filed in: Technology
Mountain Lion Server: Calendar
19/10/12 22:07 Filed in: Technology
As always, feel free to email any questions or leave a comment on my YouTube Channel.
Mountain Lion Server: Connect & Auto Mount AFP
12/10/12 21:59 Filed in: Technology
If you have any comments or questions feel free to email or leave a comment on my YouTube Channel.
Mountain Lion Server: File Sharing
05/10/12 21:52 Filed in: Technology
As always, if you have any comments or questions feel free to email, or comment on my YouTube Channel.
Mountain Lion Server: Users & Groups
28/09/12 21:43 Filed in: Technology
As always if you have any questions, feel free to email or leave a comment on my YouTube Channel.
Mountain Lion Server: Profile Manager Set Up
21/09/12 21:36 Filed in: Technology
In this tutorial I walk you through the steps of setting up the service which includes Apple’s Push Notification Certificate and SSL Certificates for secure connections between your server and your other devices. In future screencasts I will walk through each of the features available to manage and customize on your devices.
If you have any questions, feel free to email or comment on my YouTube Channel.
Mountain Lion Server: Open Directory
14/09/12 21:25 Filed in: Technology
There are two ways to set up Open Directory in MLS. In this tutorial I walk through how to set up the service itself. It can also be set up by starting up Profile Manager, which checks to see if an Open Directory Master exists and if it doesn’t, then it walks you through the process of setting one up.
Let me know how you enjoy the screencast and feel free to email or leave a comment on my YouTube Channel if you have any questions or comments.
Mountain Lion Server: DNS
07/09/12 07:12 Filed in: Technology
In this tutorial I cover how to set up your DNS and how to check to make sure your DNS is working properly. If you have any questions feel free to leave them here or reply on my Youtube Channel.
Mountain Lion Server: SSL Certificates
31/08/12 07:06 Filed in: Technology
In this tutorial I cover how to set up a self signed SSL Certificate for Mountain Lion Server to allow you to have secure connections with your server. This is required if you are going to use Profile Manager and is recommended for things like Calendar, Address Book, Mail, etc. I also cover how to integrate a third party verified SSL Certificate and how to get that certificate added to your server.
As always if you have any questions or comments, feel free to leave them here or on my Youtube Channel.
Mountain Lion Server: Port Forwarding
24/08/12 07:48 Filed in: Technology
Mountain Lion Server: Network Configuration
15/08/12 07:44 Filed in: Technology
Mountain Lion Server: Install & Set Up
10/08/12 07:39 Filed in: Technology
Mountain Lion Server: Upgrade From Lion Server
07/08/12 07:32 Filed in: Technology
Home Server with Lion Server: VPN Server
12/06/12 22:27 Filed in: Technology
In this screencast I cover which VPN protocol to choose, how to set an IP Range for your VPN Server, and how to install VPN manually on a client machine. I also show you how to connect to your VPN from a client computer and how to end your VPN session without having to use System Preferences. Enjoy!
Home Server with Lion Server: iChat Server
09/06/12 22:22 Filed in: Technology
Home Server with Lion Server: iCal Server
08/06/12 22:17 Filed in: Technology
Guest Spot on ScreenCastsOnline
14/06/12 21:53 Filed in: Technology

If you haven’t checked out ScreenCastsOnline and you are an Apple Computer user I highly recommend checking Don’s tutorials out as they are very well done and a great way to learn new ways to use your Mac. Click the screenshot below to check out my guest spot and to get a feel for the great service Don has to offer. Thanks for using my screencast Don and making it look even better to boot!
Home Server with Lion Server: Address Book Server
07/06/12 07:40 Filed in: Technology
Home Server with Lion Server: Connect & Auto Mount AFP
30/04/12 17:39 Filed in: Technology
Home Server with Lion Server: File Sharing & Home Folders
23/04/12 17:29 Filed in: Technology
Home Server with Lion Server: Users & Groups
30/03/12 09:30 Filed in: Technology
When managing multiple users it can be time consuming if you have to make changes on a per account basis, so Lion Server has the ability to set up groups that allow you to make changes to the group that filters down to all the users in that group. That way you can set up groups for your kids or other groups that allows you to make those changes once that will affect everyone in that group.
In this screencast, I cover setting up users and groups in Lion Server. I cover how to determine the difference between a local and directory account, how to add new users and set the right permissions for services, and how to use groups to make changes once that affect all the users in the group. Building on this in Part 7, we will cover how to set up home accounts on the server.
Home Server with Lion Server: Profile Manager Set Up
23/03/12 08:40 Filed in: Technology
In this tutorial, I cover how to set up Profile Manager. In the set up, Lion Server makes sure you have an Open Directory set up and your SSL Certificate in place (required for running Profile Manager). Open Directory allows you to manage global accounts and allows remote access as opposed to a local network directory which only allows local accounts. I am doing this tutorial early because Profile Manager sets up al the services required to run it without having to start each service separately. In a future screencast I will cover the web interface that is used to manage your devices and groups.
Home Server with Lion Server: SSL Certificates
17/03/12 06:32 Filed in: Technology
In most cases you want an SSL Certificate from a trusted third party registrar who vouches for the identity of your server. You would want this type of certificate if you were hosting a business or a server that a lot of people from the outside world would be accessing. Since we are talking about a home server, the only people accessing your server are people in your household so you really don’t need to buy a certificate you can generate one within the Server.app which is called a self-signed certificate. This certificate still keeps your information secure and works just like a purchased certificate. The difference is that you will get a message when logging in the first time saying that the certificate is not validated by a third party and to make sure you know who generated the certificate. Once you check allow you won’t have to answer that question again and everything works behind the scenes.
In this screencast, I show you how to set up one of these certificates and get it installed on your server.
Home Server with Lion Server: Port Forwarding
09/03/12 08:33 Filed in: Technology
If your router happens to be an Airport Extreme Base Station, you can have Server App manage your router for you, making sure all the necessary ports are open and allow access to the services you have configured. If you don’t have an Airport Extreme or would like to do your own port forwarding, you can do this in the software that came with your router. It will usually be referred to as NAT (Network Address Translation) and will have a section for you to add ports that you want to open up. For Lion Server, you can see a list of ports it uses for certain services HERE. Below is a tutorial I put together that explains port forwarding and how to do it both in the Airport Utility that comes with the Airport Extreme Base Station and through the Server App in Lion Server.
Home Server with Lion Server: Network Set Up
02/03/12 16:40 Filed in: Technology
In this tutorial I walk you through the steps to assigning a static IP assigned to your server using an Airport Extreme Base Station. I also cover how to update the network settings on your server to make sure it is reading the right information. This is the second part of my home server tutorials and I’ll be following up with one on port mapping in the coming week.
MoneyWell 2.0: Event Based Budgeting
24/02/12 07:17 Filed in: Technology

In this tutorial I cover the changes from version 1.7 of MoneyWell to it’s 2.0 version. I also cover the basics of using this software to set up a budget using an event based system which makes it far more flexible than the old version and saves a lot of time manually calculating what goes into each bucket category. I like the new system and think you will as well.
Money Management with MoneyWell 2.0
18/02/12 08:04 Filed in: Technology
MoneyWell is not just a digital ledger for your finances, though it does that very well. It is also an envelope system at the same time. MoneyWell uses the analogy of buckets that you fill with money instead of envelopes. You set a budget based on your spending for different categories and MoneyWell lets you know how well you are doing against that budgeted amount. So you can actually see where your money is going instead of lamenting after the money is already gone. I have used this software for a few years now and I have really grown to love it.
Recently the developer of MoneyWell, Kevin Hoctor, put out a new update which changed the interface quite a bit. It really made it nicer to look at and updated it to the new Lion/iOS look and feel. Many people got upset and felt it was completely different and there was some uproar over at the Mac App Store about it. In and effort to show how the program is similar to old one and some of the things that have changed, I did this screencast. Hopefully it will help people to decide whether to upgrade or not. Personally, I like the new interface and some of the changes that were made. There are some things I would like to get back, but over all it has been a good upgrade for me.
Home Server with Lion Server: Set Up & Installation
16/02/12 07:59 Filed in: Technology
Still with all of the improvements, this is still a server package and as a result has some complexity to it over what you may be used to with your current client software. To help you through the process of setting up and installing a home server, I am doing a series of screencasts on Lion Server to walk you through the process. This tutorial includes thinking through hardware, setting up a domain name if you want to access your server from outside your home, initial installation, and setting up your host name. All of this is done from the perspective of adding Server to your existing lion install not a new computer set up.
Slink: Remote Computer Management
31/01/12 07:47 Filed in: Technology

Slink is a remote computer management program that is simple to use. You install the main management component on your computer. Then you install a small preference pane program on each of the computers you want to manage. You only pay for the management component which is currently $19.99 US in the Mac App Store. Once this is all set up, you add your relatives computers to your computer list and connect to those computers with a unique code that each has. Once you have those computers added, you only have to click the computer you want to connect with from a menubar drop down, plug in their password, and you are all set. The cool thing is it sets your computer up as if you are on the local network of the computer you are trying to help. That way you can share the screen and connect to any of the bonjour services that your relative may have running on their computer, including iTunes home sharing and iPhoto sharing.
It really is a neat package. I did a screen cast walkthrough on it which you can view below. The developer Olof is a really great guy and offers excellent support. If you are the IT department for your family you will find this tool indispensable!
iTunes Match Part 4-Troubleshooting
24/01/12 15:49 Filed in: Technology
In this screencast I go over some things you can try to get some of your uploaded files to match. Since Apple doesn't tell us what they use, we can only guess at some of the things that might make a match happen. Based on some research on what some have reported as working for them, I show how to change metadata and song length in an attempt to move a song from uploaded to matched. I have had limited success with this, but since I have had a few songs work, I thought I would share this just in case you have a few songs you really want to try to get matched.
If you have any other suggestions of things to try or something that has worked for you, leave a comment in below and if I can get it to work I'll try to do another screencast on it.
iTunes Match Part 3-Upgrading Your Music
21/01/12 15:47 Filed in: Technology
In this screencast I cover how to upgrade your music to iTunes Plus 256kbps. We also cover a way to determine which songs in your library need to be upgraded and I walk you through how to get all of your iTunes Match music on other computers for streaming or downloading.
iTunes Match Part 2-Understanding Your Match Results
20/01/12 07:05 Filed in: Technology
Here is another screencast I did on iTunes Match. In this screencast I cover how to see your match results and determine what was matched, uploaded, or ineligible. We also talk about how to begin to troubleshoot some of the issues in iTunes Match. In a future screencast we will cover how to upgrade your songs and some techniques for getting some of your unmatched songs to match. Enjoy!
iTunes Match Set Up Walkthrough
30/12/11 18:11 Filed in: Technology
In this screencast I walk through the set up process for iTunes Match. I talk about what iTunes Match is and record my process of signing up and starting the match process. In future screencasts I will show other tips and tricks to making iTunes Match work for your music collection. So far iTunes Match has been a great way to get all of our music on all our household devices. Check out the screencast and see what you think. Enjoy!
Uploading & Sharing Photos in Google+
08/12/11 07:08 Filed in: Technology
In this longer screencast, I cover the photo sharing aspects of Google+. This screencasts covers the size limits of photos uploaded, the process of uploading and managing photos, how to share and edit photos online, and how Google+ interfaces with Picasa Web Albums. I really like the photo features of Google+ and many photographers have been moving from Flickr to using Google+. The free uploads and unlimited storage of high resolution photos and the great sharing features and active photo community make it a great place for photo sharing. Take a look at the screencast and let me know what you think.
Setting Up Your Profile Page on Google+
18/11/11 13:29 Filed in: Technology
This is the second screencast in the series I’m doing on Google+. In this screencast I cover how to set up your profile page and what all the security features look like. If you have any questions or comments feel free to respond below. Also if there are other screencasts you would like me to do leave a comment and I’ll see if I can make it happen.
You can also follow all my screencasts at my Youtube Channel. Enjoy!
You can also follow all my screencasts at my Youtube Channel. Enjoy!
An Overview of Google+
11/11/11 14:34 Filed in: Technology
Here is a screencast walkthrough of Google+, Google’s new social media site. Google+ is a lot like Facebook but with some added features. You also get the integration of many of the other Google services into Google+ and it has become a pretty big hangout for photographers especially with unlimited uploads at high resolution (2048x2048 pixels). I will be adding more screencasts on each feature of Google+ but this should get you started if you always wondered what it was and wanted a tour without having to commit. Let me know what you think and any other screencasts you would like me to do in the comments below.
You can also follow all my screencasts at my Youtube Channel. Enjoy!
You can also follow all my screencasts at my Youtube Channel. Enjoy!
SuperDuper!: Backing Up Multiple Drives to One
28/10/11 11:20 Filed in: Technology
I recently had my dad ask how to update two drives to one. He has two internal drives in his MacPro that he he wants to back up to his Drobo without using Drobo Copy which has been giving him errors lately. He doesn’t want to go through the process of partitioning his Drobo which I have tried before on a Drobo and is not really the way I like to use my Drobo either especially since my space needs could change at anytime and having to repartition a Drobo takes a lot of time and takes away the benefit of just adding storage. I prefer to use it as one big drive myself.
To help him see how to back up two drives to one, I put together a podcast to walk him through the process. The basic instructions on how to do this can be found in the manual for SuperDuper! found HERE. Enjoy!
To help him see how to back up two drives to one, I put together a podcast to walk him through the process. The basic instructions on how to do this can be found in the manual for SuperDuper! found HERE. Enjoy!
Making the Move to iCloud
18/10/11 21:34 Filed in: Technology
Apple recently revamped their MobileMe service and moved it to iCloud which is a way to keep all of your information in sync between your devices and also available in the cloud. This is a major update and involves a few steps to get everything moved over so I thought I would do a screencast to record my process of moving my MobileMe account over to iCloud for those who are visual and want to see what will happen step by step before they take the leap. In the video I reference a few sites that Apple has put up to help walk people through the process so I am putting the links below for those who just want the facts and don’t need to see the walk through. This is my first podcast so there are probably some things in the production that are not quite right such as the number of times I say “um”.
How to Set Up iCloud: http://www.apple.com/icloud/setup/
MobileMe Move Site: http://mobileme.com/move
How to Set Up iCloud: http://www.apple.com/icloud/setup/
MobileMe Move Site: http://mobileme.com/move